How to Create Beautiful Flower Arrangements

Creating stunning floral arrangements can bring life and beauty to any space. Whether you’re crafting a centerpiece for a dinner party or looking to brighten up your home, there are endless possibilities for creativity and expression. So, how can you design breathtaking floral compositions that impress and delight? Here are some expert tips to help you become a floral artist:

First, source your flowers carefully. Opt for a mix of blooms in varying shapes and sizes, from delicate buds to full, lush blossoms. Consider the color palette you wish to work with and choose shades that complement each other. Think beyond the petals, too: incorporate interesting foliage, branches, and berries to add texture and depth to your arrangements.

When it comes to composition, odd numbers are your friend. Groupings of three or five often create a pleasing visual effect. Play with height and depth to craft dynamic arrangements. Try using taller blooms as a focal point and then filling in with smaller blooms and greenery. Think about the overall shape, too – triangular compositions are classic and tend to be visually appealing.

Proportion is key. Ensure your flower arrangement is suited to the size of your vase or container. As a rule of thumb, the height of your arrangement should be one-and-a-half to two times the height of the vase. For example, if your vase is 10 inches tall, your flowers should be between 15 and 20 inches in length.

Don’t be afraid to get creative with your containers. Think outside the traditional vase and experiment with unique vessels such as vintage teapots, rustic pitchers, or elegant urns. Not only do they add a touch of personality to your arrangements, but unique containers can also make your floral designs truly unforgettable.

Remember to always cut your flowers at an angle and remove any leaves that will be submerged in water to prevent bacterial growth and keep your flowers fresh for longer. Change the water regularly, and add a flower food packet to provide essential nutrients and help your blooms thrive.

For a touch of elegance, try incorporating trailing foliage or flowers that spill over the edge of your container. This adds a sense of movement and fluidity to your arrangement. Also, consider playing with color gradients. Ombré arrangements, where the flowers graduate from light to dark shades, create a stunning visual effect that’s sure to impress.

When crafting a bouquet, pay attention to the grip. Hold the bouquet at the point where the stems feel most balanced, and then use your thumb as a guide to create a spiral design with the stems, resulting in a secure and aesthetically pleasing grip.

Add a personal touch with unique embellishments like ribbon, twine, or even small decorative charms. These finishing touches can elevate your arrangements from simple to simply stunning. Lastly, remember to have fun with it! Floral design is an art form, and experimentation is part of the process. So, let your creativity bloom and enjoy the beauty you create.

When displaying your arrangement, choose a location that showcases it to its best advantage. Consider placing it where it will be noticed and appreciated, such as an entryway or dining table. Illuminating your floral creation with the right lighting can also enhance its beauty and create captivating shadows and highlights.

Remember that flower arrangements are a creative expression, so feel free to break the rules and let your individual style shine through. Whether you’re going for a wild, just-picked-from-the-garden look or a more structured, architectural design, always trust your instincts and have fun with it!

With these tips in mind, you’re well on your way to becoming a floral artist, crafting breathtaking arrangements that captivate and inspire. So, get creative, experiment with different techniques, and let your floral designs flourish! By embracing your unique style and creativity, you’ll be sure to craft arrangements that not only bring beauty to your space but also reflect your unique personality and artistic flair.
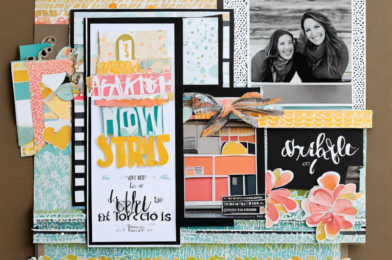
DIY Scrapbooking Tips and Tricks

Scrapbooking is a wonderful way to preserve memories, spark creativity, and even relax and de-stress. Whether you’re a seasoned scrapbooker or a beginner, there are always new tips and tricks to discover and techniques to explore. Here are some ideas to enhance your scrapbooking journey and create beautiful, meaningful layouts.

First, consider your theme and color scheme. Selecting a cohesive color palette will make your scrapbook pages look polished and professional. Choose a few complementary colors and use them throughout your layout, incorporating them into your photos, papers, and embellishments. This creates a sense of harmony and visual appeal.

Next, think about the story you want to tell. Scrapbooking is about more than just pictures; it’s about capturing memories and the emotions attached to them. Journaling is a great way to add context and meaning to your pages. Write about the people, places, and events in your photos, and don’t be afraid to include personal anecdotes and feelings. Your future self will thank you for these precious memories preserved in your own words.

Variety is the spice of life, and the same goes for your scrapbook pages. Mix and match different textures and dimensions to create visual interest. Use a combination of flat and three-dimensional embellishments, or try incorporating fabric, ribbon, or twine for a tactile element. You can also create depth by layering papers and elements, giving your layout a sense of movement and dimension.

Embrace your creativity and experiment with different techniques to add unique touches to your pages. Try your hand at stamping, embossing, or die-cutting. These techniques allow you to customize your embellishments and create truly one-of-a-kind designs. There are countless online tutorials and resources available to guide you through these methods, so you can create pages that truly reflect your style and personality.

Another tip is to think outside the box when it comes to your photos. While traditional rectangular photos are classic, don’t be afraid to experiment with different shapes and sizes. Try circular or polaroid-style prints, or even tear the edges of your photos for a more rustic, vintage look. You can also play with the orientation of your pictures by placing them at angles or creating a fun collage effect.

Scrapbooking doesn’t have to break the bank. Get creative and look for everyday items that can be used as embellishments. Buttons, stickers, and washi tape are all inexpensive options that can add color and interest to your pages. You can also make your own embellishments by cutting out shapes or using punches on patterned paper. So, don’t be afraid to scour thrift stores and craft supplies for unique and budget-friendly finds.

Visual triangles are a design concept that can help create balance and harmony in your layouts. Identify a particular color, shape, or element and repeat it in three different places on your page to form a triangle. This technique will draw the viewer’s eye around the page and create a sense of unity and coherence. It’s a simple yet effective way to make your scrapbook pages visually appealing.

In the world of scrapbooking, sketches are like blueprints, providing a basic framework for your layout design. While you can certainly create your own sketches, there are also plenty of online resources and scrapbooking communities that share sketches to inspire your creations. Using a sketch can take the guesswork out of designing your page, allowing you to focus on the fun parts, like choosing papers and embellishments. It’s like having a head start on your layout, making the process faster and more enjoyable.

When it comes to scrapbooking, don’t be afraid to let your personality shine through. Incorporate your own unique style and experiment with different techniques to make your pages truly yours. Try your hand at mixed media techniques, such as painting, inking, or using gelatos. Add handwritten journaling or draw doodles and arrows to direct the flow of your layout. Embracing your individuality will make your scrapbook pages authentic and full of character.

One of the best things about the scrapbooking community is the abundance of inspiration and resources available online. Join scrapbooking groups on social media, subscribe to craft blogs, or follow your favorite scrapbook supply companies to stay up-to-date with the latest trends and techniques. These communities are a wealth of knowledge and can provide endless ideas and support. You can also find free printables, cut files, and digital scrapbooking supplies to use in your projects.

Sometimes, keeping things simple is the best approach. When faced with a creative block, opt for clean lines and a minimalist aesthetic. Choose a single focal point, whether it’s a large photo or a cluster of embellishments, and allow it to shine. Using plenty of white space can make your layout feel airy and elegant. This approach is especially effective when showcasing a special photo or highlighting a meaningful piece of journaling.

Last but not least, don’t forget to have fun! Scrapbooking is a wonderful hobby that allows you to express your creativity and document your precious memories. Enjoy the process, from selecting photos and papers to arranging and embellishing your pages. Remember, there are no hard and fast rules, so let your imagination run wild and embrace the joy of crafting. Happy scrapbooking!

I hope you enjoyed reading this article and found some inspiration for your next scrapbooking project. If you have any specific questions or would like further guidance on this topic, please don’t hesitate to let me know!

Fun and Festive DIY Party Decorations

Creating festive party decorations yourself can be a fun and rewarding experience, and it can also add a personal touch to your celebration. Whether you’re hosting a birthday party, a holiday gathering, or just a fun get-together with friends, here are some creative and easy DIY party decoration ideas that will surely wow your guests:

Paragraph 1:

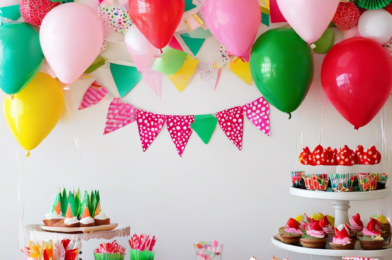
First impressions are important, so set the tone for your party from the moment your guests arrive. A creative and welcoming door sign is a perfect way to greet your guests and get them excited for the festivities ahead. You can design a colorful and fun sign with a thoughtful message or a witty pun that hints at the theme of your party. Add some streamers and balloons in complementary colors to frame your sign and instantly create a festive vibe. This simple DIY project will make a lasting impression and set the stage for a memorable celebration.

Paragraph 2:

Banners and garlands are decorative essentials for any party. They instantly add color and festivity to your venue. Opt for a customizable banner that conveys your chosen message or one that celebrates the guest(s) of honor. You can craft these banners from colorful paper, fabric, or even recycled materials. Spell out a cheerful message or the guest’s name for a personalized touch. Garlands, on the other hand, can be made from a variety of materials, including paper, fabric scraps, or natural elements like dried flowers or leaves. Hang these creations across walls, above doorways, or drape them from the ceiling to bring a playful spirit to your party décor.

Paragraph 3:

Table centerpieces are a central part of your party’s decorations and can serve as conversation starters. Instead of opting for expensive floral arrangements, get creative and make your own. For a quick and easy DIY centerpiece, fill various-sized glass vases or jars with colorful candies, chocolates, or treats that match your party’s color scheme. Surround the vases with tea lights or small LED lights to add a warm glow. Alternatively, for a more natural approach, arrange seasonal flowers or greenery in mason jars or rustic pots. Table centerpieces don’t have to be complex – simplicity often makes a subtle yet impactful statement.

Paragraph 4:

Place cards are a wonderful way to make your guests feel special and add an extra touch of personalization to your party. You can design unique place cards with each guest’s name and a thoughtful message or a fun fact about them. Get creative with the card designs, incorporating colors or motifs that align with your party theme. You can also attach small gifts or favors to the place cards, making them feel appreciated and adding a memorable keepsake to their party experience. Place cards contribute to a well-thought-out party ambiance and can even facilitate new friendships as guests bond over their personalized messages.

Paragraph 5:

Balloons are a classic party staple, and you can elevate them with a creative twist. Fill transparent balloons with small confetti pieces or glitter before inflating them. This simple addition creates a festive and fun look, especially when paired with a balloon arch or garland. You can also experiment with different balloon shapes, like stars or large letters spelling out a message. For a more sustainable option, opt for biodegradable balloons, which are environmentally friendly without compromising on the festive spirit. Whether you choose to hang them from the ceiling, use them as photo backdrops, or let them float freely, decorated balloons are sure to elevate the fun and festive atmosphere of your party.

Paragraph 6:

Party games are a surefire way to break the ice and get your guests mingling, and DIY games add a unique touch. Create a life-size board game, like a human-sized checkerboard or a giant outdoor Scrabble game. You can also set up a photo booth with fun and quirky props, encouraging guests to strike a pose and create memorable keepsake photos. For a more nostalgic twist, introduce handmade pinwheels or create a piñata filled with treats and small prizes. These interactive DIY additions will not only entertain your guests but also make lasting memories, ensuring your party is one to remember.

Paragraph 7:

Nothing sets the mood and ambiance of a party quite like lighting. Enhance your party venue with creative lighting solutions to set the desired atmosphere. String lights are a versatile option, capable of transforming both indoor and outdoor spaces. Drape them across walls, wind them around railings, or hang them from the ceiling to create a whimsical effect. For a more rustic charm, incorporate candlelit lanterns, especially if your party extends into the evening. Fairy lights, with their dainty appearance, can be effortlessly woven into decorations, adding a subtle sparkle. Play with lighting options to achieve the perfect balance of aesthetics and functionality, creating an inviting and enchanting party atmosphere.

Paragraph 8:

Party backdrops are essential for creating Insta-worthy photos and memorable keepsake pictures. Design a backdrop that showcases the theme and color scheme of your party. You can use large sheets of colorful paper, fabric backdrops, or even curtain backdrops. Hang streamers, balloons, and paper pompoms to add depth and texture. For a more personalized touch, incorporate a backdrop with a meaningful message, such as a large initial or monogram. Backdrops can also provide a versatile decorative piece, doubling as a gift table adornment or a behind-the-cake display. Whether it’s a simple DIY creation or an extravagant design, a well-crafted backdrop will undoubtedly elevate your party’s visual appeal.

Paragraph 9:

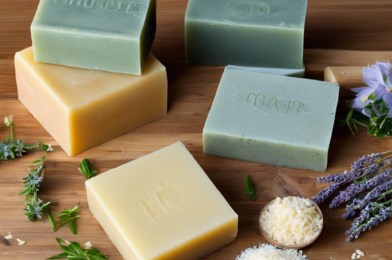
Party favors are a thoughtful way to thank your guests for celebrating with you and provide them with a memorable token of the occasion. Personalize the favors to align with your party’s theme or incorporate your guests’ interests. For a sweet treat, create custom cookies or chocolate bars with playful messages or the guests’ names. Small potted plants, succulents, or customized mugs also make excellent favors. If you’re feeling crafty, try making DIY soaps or candles with delightful scents that remind guests of the wonderful time they had. No matter how big or small the favor, your guests will appreciate the sentiment and the reminder of the fun-filled celebration.

Paragraph 10:

When it comes to DIY party decorations, creativity knows no bounds. Think outside the box and utilize everyday items in new and imaginative ways. For example, transform empty tin cans into colorful vases or utensil holders, or turn old wine bottles into chic centerpieces by filling them with fairy lights. Give new life to used lightbulbs by painting them and hanging them as miniature terrariums. Mason jars can be repurposed into drinking glasses, complete with personalized labels. Even something as simple as wrapping string lights around a hula hoop can create a captivating ceiling decoration. Embrace your creativity, and you’ll be surprised at the unique and budget-friendly decorations you can craft.

Paragraph 11:

In conclusion, crafting your own party decorations is a fun and rewarding endeavor that adds a unique and personal touch to your celebration. From welcoming door signs to creative lighting solutions, there are countless ways to transform your venue into a festive wonderland. Embrace your creativity, and don’t be afraid to experiment with different materials and ideas. By incorporating these DIY decorations, you’ll not only impress your guests but also create lasting memories that will be cherished long after the party ends. So, get crafting, and let your festive spirit shine through in every delightful detail. Happy partying!

Creative DIY Projects for Pet Owners

Pet owners often go above and beyond to spoil their furry friends, and what better way to show your pet some love than by getting creative and crafting something special just for them? Whether you’re a dog person, a cat enthusiast, or have a menagerie of animals in your home, there are endless DIY projects you can undertake to cater to your pet’s unique needs and personalities.

One popular trend in the DIY pet community is building custom furniture. This could be anything from a cozy cat condo to a sleek and modern dog bed that complements your home’s aesthetic. With a bit of woodworking skills and some online tutorials, you can create a one-of-a-kind piece that your pet will adore. Don’t have the tools or the time? No problem! There are plenty of no-sew and upcycling projects that can be just as fun and creative. For example, you can transform an old sweater into a comfy pet bed by simply cutting and stuffing it, or turn a cardboard box into a chic cat scratcher with some clever folding and glue.

If you’re feeling adventurous, you can even try your hand at making your own pet toys. Cats will adore playful creations, such as a dangly toy made from colorful ribbons and a stick, while dogs will fetch with pride a handmade toy. You can also create your own treats with simple, healthy recipes. Bake some dog biscuits with natural ingredients like peanut butter and bananas, or whip up some catnip-filled treats for your feline friends. Not only will you know exactly what goes into their food, but you’ll also save money on store-bought treats.

For those with outdoor spaces, the possibilities are endless. You could construct a luxurious chicken coop for your feathered friends, complete with a run and nesting boxes, or build an elaborate guinea pig enclosure with multiple levels and hiding spots. If you’re feeling really ambitious, why not design an obstacle course for your dog’s agility training? With some PVC pipes, obstacles, and treats for motivation, you can create a fun and challenging course right in your own backyard.

Another idea is to personalize your pet’s accessories. From painting food bowls with their name and fun designs to bedazzling their collar and leash with colorful gems and charms, you can add a touch of personality and bling to their everyday items. You might even consider knitting them a cozy sweater for chilly days, or sewing a bandana with their name monogrammed on it.

There are endless ways to express your love for your pets through creativity and DIY projects. So, get inspired, gather your materials, and have fun crafting something special for your furry, feathery, or scaly friends! The possibilities are endless, and your pets will surely appreciate your efforts, even if they can’t say it aloud. Happy crafting!

How to Make Your Own Soap

Making your own soap at home might seem like a daunting task, but it’s actually a fun and rewarding hobby that anyone can try. Homemade soap not only allows you to control the ingredients used, ensuring a natural and often organic product, but it also offers a sense of satisfaction and self-sufficiency. So, if you’re curious about crafting your own cleansing bars, here’s a step-by-step guide to get you started on this sudsy adventure.

First, gather your ingredients. The main components of soap are oil or fat and lye (sodium hydroxide). You can use a variety of oils, such as olive, coconut, palm, and avocado, and combine them to create your desired properties. Just be sure to use precise measurements and a good quality scale. Next, prepare your workspace. Making soap involves dealing with caustic soda, so safety gear is essential. Wear gloves and protective eyewear, and make sure the area is well-ventilated. Cover your work surfaces and have vinegar nearby in case of spills, as it neutralizes lye.

Now, you’re ready to begin the soap-making process. Mix your chosen oils and lye solution, being careful to avoid breathing the fumes. Use a stick blender to bring the mixture to a light or medium trace, which means the soap has thickened enough to leave a trace behind when you drizzle it on the surface. Add your favorite essential oils, fragrances, or natural colorants at this stage if desired. Once your soap is traced, carefully pour the mixture into a mold and cover it with plastic wrap.

After 18–24 hours, your soap should be firm enough to remove from the mold. Cut it into bars and place them on a rack to cure for four to six weeks. This curing process ensures your soap lasts longer in the shower. During curing, make sure your soap is in a cool, dry place with good airflow. Flip the bars occasionally to ensure even drying.

While making soap may seem intimidating at first, with careful preparation and adherence to safety guidelines, you can master this craft. The satisfaction of creating a useful product with your own hands is well worth the effort, and the possibilities for creativity are endless. From choosing your favorite oils to experimenting with scents and colors, the art of soap-making is a delightful journey that can lead to a thriving hobby or even a small business venture.

One of the great appeals of soap-making is the opportunity to personalize your creations. You can customize your soaps by experimenting with different combinations of oils, adding exfoliants like oatmeal or ground coffee, and infusing them with essential oils for aromatherapy benefits. The options are limitless, and you can create soaps tailored to specific skin types or simply to indulge your senses. Whether you’re crafting a soothing lavender-scented bar or a invigorating citrus blend, the process of designing your own unique soaps is a rewarding and creative pursuit.

Another advantage of making your own soap is the ability to control the ingredients and ensure they are natural, organic, and ethically sourced. Many commercial soaps contain harsh chemicals, synthetic fragrances, and other undesirable additives. By making your own, you can avoid these potentially irritating or harmful substances and opt for gentle, nourishing alternatives. This is especially beneficial for those with sensitive skin or specific skin concerns. Creating your own soap allows you to embrace a more natural and wholesome approach to personal care.

For those seeking a fun and unique gift idea, homemade soap is a thoughtful and practical option. Whether it’s a birthday, holiday, or housewarming gift, handmade soap showcases your creativity and thoughtfulness. You can customize the soaps to match the recipient’s favorite colors, scents, or even embed a special message or design. Present your soaps in attractive packaging, perhaps paired with a loofah or washcloth, and you have a one-of-a-kind gift that’s both useful and memorable.

Simple and Stylish DIY Home Improvements

Giving your home a stylish upgrade doesn’t have to break the bank or involve extensive renovations. Simple DIY improvements can make a significant impact and inject personality into your space. Here are some easy and trendy projects to enhance your home’s style and functionality without undergoing a full-scale renovation.

First, consider enhancing your walls with a fresh coat of paint or creative wallpaper. Opt for a bold accent wall or experiment with unique colors and patterns to create a focal point in any room. Wall treatments are an increasingly popular DIY project, offering a cost-effective way to make a big design statement. From tropical prints to geometric designs, the options are endless for adding a touch of your personal style to your home.

Another simple improvement is updating your cabinet hardware. Swapping out outdated knobs and pulls for modern or quirky designs can instantly refresh the look of your kitchen or bathroom. This small change can be done in an afternoon and makes a surprising difference in the overall aesthetic of the room. Explore local hardware stores or online markets for an array of affordable options.

Installing new light fixtures is another impactful DIY project. Whether you opt for a statement chandelier or sleek, modern wall sconces, lighting plays a crucial role in setting the mood and ambiance of a room. With a range of styles and price points available, you can easily find fixtures that align with your taste and budget. Simple changes like these can truly elevate your home’s style and make it feel special.

To enhance your home’s curb appeal, focus on the front door. A bold new color or a stylish door handle and knocker can create a welcoming and memorable entrance. Add a unique house number and a stylish mailbox to complete the look. Simple improvements like these can significantly boost your home’s exterior appeal and leave a lasting impression on visitors and passersby.

In the bathroom, simple upgrades like a new showerhead or stylish faucet can make a noticeable difference. Opt for water-saving models with a trendy design to combine functionality and style. These small changes can improve your daily experience and even reduce your water bills. Similarly, in the kitchen, consider upgrading your sink and faucet for a fresh, modern look.

Simple DIY improvements also extend to your home’s outdoor spaces. Create a cozy and inviting atmosphere by adding string lights to your patio or porch. Soft lighting creates a magical ambiance for evenings spent relaxing or entertaining al fresco. Additionally, building a simple vertical garden or installing hanging planters can add life and color to your outdoor areas without requiring a large yard or extensive landscaping.

For a quick and affordable bedroom makeover, create a stylish headboard. Whether you opt for a rustic wood design or an upholstered masterpiece, a headboard can become the focal point of the room. This project can be customized to fit your style and space, and it makes a dramatic impact in any bedroom. It’s the perfect weekend project for aspiring DIYers.

Finally, don’t underestimate the power of accessories and decor. Throw pillows, rugs, and artwork can instantly transform a space by injecting color, pattern, and personality. Curate gallery walls with meaningful photos or artwork to create a unique focal point. These simple additions can tie the whole room together and showcase your individual style throughout your home.

Whether you’re a seasoned DIY enthusiast or a beginner, these simple and stylish improvements are achievable for anyone wanting to enhance their living space. With a bit of creativity and some elbow grease, you can transform your house into a home that truly reflects your unique style and personality.

DIY Craft Ideas with Recycled Materials

The world of DIY crafts is an exciting and creative space, offering endless possibilities for crafting enthusiasts. One of the most satisfying aspects of this hobby is transforming recycled materials into something new and beautiful. Not only is it a fun and inexpensive way to pass the time, but it also helps reduce waste and promote sustainability. So, let’s explore some inspiring DIY craft ideas that will have you digging through your recycling bin!

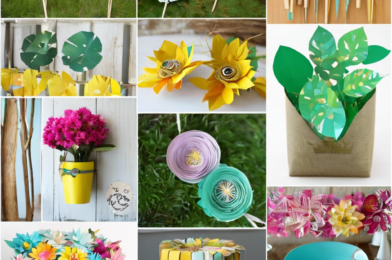
One of the most versatile recycled materials for crafting is glass jars. Whether you’re saving old spaghetti sauce containers or pickle jars, these can be upcycled in countless ways. A popular idea is to create hanging lanterns by inserting tea lights or string lights into the jars and suspending them from tree branches or porch beams. For a festive touch, decorate the outside of the jars with paint, twine, or ribbons. These illuminated jars will create a magical ambiance in any outdoor setting.

Another simple yet effective craft idea is to transform toilet paper or paper towel tubes into stylish storage cylinders. Cut the tubes to your desired height and decorate them with colorful washi tape, paint, or fabric. These cylinders can then be used to store pens, paintbrushes, or even cutlery, adding a unique touch to your desk or dining table. You can also create a DIY organizer for your desk or vanity by cutting and folding the tubes into compartments for storing small items such as paper clips, push pins, or makeup brushes.

If you’re feeling adventurous, try crafting your own recycled paper. This process is both fun and educational, especially for those interested in the traditional art of papermaking. Start by collecting and tearing up discarded paper materials such as envelopes, magazines, or junk mail. Soak the paper pieces in water until they turn into a pulpy consistency. Then, using a frame and screen, lift the paper pulp and allow it to dry, resulting in unique sheets of handmade paper perfect for journaling, card-making, or scrapbooking.

For a more challenging project, try constructing furniture from recycled cardboard. Large appliance boxes, when broken down, provide sturdy and lightweight material for crafting tables, chairs, or even shelves. Cut and fold the cardboard into the desired shape and secure the pieces together using glue or heavy-duty tape. You can leave the furniture plain for a modern aesthetic or cover it with fabric or decorative paper for a more personalized touch. Don’t forget to add extra reinforcement for heavier items!

These are just a few ideas to spark your creativity. With a bit of imagination, the possibilities for crafting with recycled materials are endless. So, before you toss something into the recycling bin, consider how it could be transformed into a work of art or a functional item for your home. Happy crafting!

Remember to share your creations online and inspire others to embrace the joy of crafting with recycled materials. Tag your projects with relevant hashtags such as #UpcycledCrafts or #DIYRecycledArt to showcase your unique and sustainable creations to the world. Encourage your fellow crafters to join the sustainable journey and together, we can make a difference, one craft at a time!

Until next time, stay creative and keep crafting!

Best DIY Craft Ideas for Teens

Crafting is a fun and creative way for teens to express themselves and let their imaginations run wild. With a multitude of options available, teens can explore different materials and techniques to create unique and personalized items. So, let’s dive into some of the best DIY craft ideas that are sure to spark creativity and keep teens entertained and engaged!

Teens can start by upcycling old items and giving them a new lease of life. Transforming tired furniture, like an old chair or dresser, can be an exciting project. Sanding down the piece and repainting it with a fun color or pattern can give it a whole new look. Teens can also try their hand at decoupage, using pretty paper or fabric to decorate the surface and protect it with a coat of varnish. This is a great way to add a personal touch to their bedroom or create a one-of-a-kind gift for a friend. Accessories such as jewelry and bags can be customized too for a unique look.

Another great craft idea for teens is to create their own unique stationery. They can design and decorate notebooks, journals, and greeting cards with their own artwork, quotes, or photographs. Embossing and foil stamping are also fun techniques to try, adding a touch of luxury to their creations. These handmade stationery items make great gifts or can be used for journaling and creative writing.

Moving on, candle and soap making are fantastic crafts for teens. They can get creative with different shapes, colors, and fragrances to make their own unique products. Soy wax is a great option for candles, and teens can experiment with essential oils to create natural, eco-friendly candles that fill the room with a delightful aroma. Similarly, soap making allows teens to customize the ingredients, colors, and scents to create beautiful, handmade soaps that are gentle on the skin.

For those who enjoy working with their hands, woodworking and whittling can be incredibly rewarding. Teens can start with simple projects like creating a wooden sign or a small sculpture. With adult supervision, they can learn to use basic woodworking tools and techniques to bring their creations to life. It’s a great way to develop problem-solving skills and gain a sense of accomplishment from working with natural materials.

Teens with a passion for fashion can try their hand at designing and creating their own clothes. They can start by altering thrift store finds, adding their own unique touches with embroidery, tie-dye, or fabric paint. Sewing is a valuable skill to learn, and teens can create one-of-a-kind garments that reflect their individual style. Accessories such as scarves, headbands, and bags can also be crafted, allowing teens to showcase their creativity in their everyday wardrobe.

Creating artwork for their walls is another excellent craft idea for teens. They can express their individuality and creativity through painting, drawing, or mixed media collage. Teens can also experiment with different art techniques such as watercolor, acrylic pouring, or digital art to create stunning pieces that they can frame and display with pride. Displaying their artwork can brighten up their space and inspire them daily.

Additionally, teens can explore the world of resin art and create stunning, unique pieces. They can incorporate dried flowers, glitter, or pigments to create colorful coasters, jewelry, or home decor items. Resin art allows for incredible creativity and the creation of one-of-a-kind pieces that teens will adore. It’s a fun way to experiment with new materials and create something truly special.

For the teens who love to get their hands dirty, pottery and ceramics are fantastic craft ideas. They can learn hand-building techniques or try their hand at the potter’s wheel to create unique bowls, mugs, or sculptures. Decorating their creations with glazes and paints adds a personal touch, and the finished pieces can be used or displayed with pride. Working with clay is a therapeutic and rewarding experience that allows teens to connect with a traditional art form.

Lastly, teens can explore the art of paper quilling, which involves rolling and shaping thin strips of paper to create beautiful designs. They can make greeting cards, wall art, or even jewelry with this technique. Paper quilling is a fun and inexpensive craft that allows for endless creativity. Teens can experiment with different colors, shapes, and patterns to create delicate and intricate designs that will impress their friends and family.

There are endless possibilities for teens to explore their creativity and express their individuality through DIY crafts. These ideas provide a great starting point, and with a bit of guidance and imagination, teens can create amazing things. So, let’s encourage teens to dive into the world of crafting and unlock their limitless creative potential!

DIY Projects to Organize Your Home

As a busy individual, maintaining an organized home can feel like a never-ending challenge. The chaos of everyday life often leaves little time for tidying up, and before you know it, your living space resembles a hurricane’s aftermath. But fear not! With a bit of creativity and some simple DIY projects, you can transform your home into a haven of order and efficiency.

One great way to get started is by tackling the entryway or mudroom. This area is often a catch-all for shoes, coats, and miscellaneous items brought in from the outside. Install some sturdy shelves and hooks to create a designated space for each family member’s belongings. You can also add a bench with storage baskets underneath for hiding away gloves, scarves, and other small items.

The kitchen is another high-traffic area that can quickly descend into disarray. Maximize your storage space by installing pot and pan racks on the walls and investing in some attractive canisters for frequently used items like flour, sugar, and pasta. Don’t forget to utilize the power of labels! Clear, labeled containers make it easy to find what you’re looking for and can even add a touch of style to your pantry or cabinets.

If you’re dealing with a small bedroom, it’s crucial to make the most of every inch of space. Consider raising your bed on bed risers and using the extra room for storage bins or even a secret hideaway for your furry friend’s bed and toys. You can also install floating shelves above the bed for books, plants, or decorative items.

The bathroom is another area where organization is key. Make the most of your vertical space by adding over-the-door storage and installing shelves or cabinets above the toilet. Use attractive baskets or bins to corral smaller items and create a spa-like atmosphere with coordinated containers and matching towels.

For those with a green thumb, creating a garden tool organizer is a must. Install a simple pegboard and attach hooks for hanging tools, gloves, and other gardening essentials. Not only will this keep your tools in top condition, but it’ll also save you time and frustration when you’re ready to head out to the garden.

These are just a few ideas to get you started on your journey to a more organized home. By taking the time to implement these simple DIY projects, you’ll save yourself time, energy, and the stress that comes with living in a cluttered space. So, roll up your sleeves, gather your supplies, and get ready to transform your living space into the calm, orderly haven you deserve!

How to Create Your Own Candles

Creating your own candles is a fun and rewarding hobby that can also turn into a lucrative business venture. While it may seem intimidating at first, the process is relatively simple and only requires a few basic supplies. So, if you’re tired of spending a small fortune on store-bought candles or are simply looking for a new creative outlet, read on for a step-by-step guide on how to make your own candles at home.

First, you’ll need to gather the necessary supplies: wax, wick, a heat-safe container, fragrance oil, and color dye (if desired). You can find these items at your local craft store or online. Once you have your supplies, it’s time to get started.

Begin by melting your wax in a double boiler or dedicated wax melter. Once the wax has melted, carefully pour it into your heat-safe container. Allow the wax to cool slightly, then add your desired amount of fragrance oil and color dye, if using. Stir the mixture gently to ensure the ingredients are well combined.

Next, it’s time to prepare your wick. Cut the wick to the appropriate length, leaving a small amount of excess at the top. Secure the wick in place using a wick holder or super glue. Then, carefully pour the liquefied wax around the wick, being careful not to move it out of place.

Allow your candle to cool and set completely, which may take several hours. Once it’s hard, you can trim the excess wick, and your candle is ready to burn!

Personalizing your candles is part of the fun. Experiment with different types of wax, such as soy or beeswax, and try out various fragrances and colors to create unique, custom-made candles. You can even get creative with the containers, opting for stylish jars or unique shapes to make your candles stand out.

Making your own candles is a great way to save money, reduce waste, and create personalized, eco-friendly gifts for your loved ones. With a bit of practice and creativity, you’ll be well on your way to becoming a candle-making pro!

If you’re feeling particularly passionate about your creations, you could even consider turning your hobby into a side hustle. Many successful small businesses have grown out of a love for candle-making. With unique scents, eye-catching designs, and sustainable practices, there’s a market for one-of-a-kind, hand-poured candles. So, why not give it a go and see where your new hobby takes you? You might just end up illuminating more than just your home!