DIY Macrame Wall Hangings for Beginners

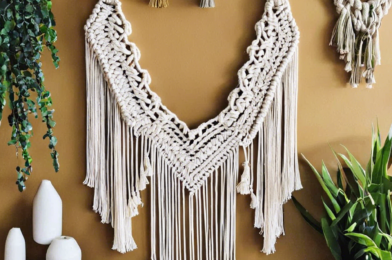
Macrame wall hangings are a beautiful and creative way to add texture and interest to your home decor. And the best part? You can easily make them yourself, even if you’re a complete beginner! With just a few basic knots and some simple techniques, you can create stunning macrame wall hangings that will impress your family and friends.

So, where do you start? Firstly, gather your supplies. All you need is some cord or rope, scissors, and a ring or stick to hang your creation. You can find these materials at any craft store or even online. Once you have your supplies, decide on a pattern or design for your wall hanging. There are countless tutorials and videos available online that can guide you through the process step-by-step.

Start with something simple if you’re a beginner. You can try more complex patterns as you become more comfortable with the knots and techniques. The most common knots used in macrame are the square knot, the half-hitch, and the clove hitch. Practice these knots until you feel confident, and then you can begin to experiment with creating your own unique designs.

When you’re first starting out, it can be helpful to work with a larger rope or cord, as this makes it easier to see and manipulate the knots. As you become more experienced, you can progress to thinner cords, which will give your wall hangings a more delicate and intricate look. Remember to take your time and be patient with yourself. Macrame is a creative process that requires practice and precision.

As you begin to knot your cord and see your wall hanging take shape, you’ll feel a sense of accomplishment and pride. It’s incredibly satisfying to see your creation come to life, knot by knot. Experiment with different types of cord or rope to add texture and dimension to your creations. Try using cotton cord, jute, or even recycled T-shirt yarn for a unique and sustainable option.

Once you’ve mastered the basic knots and techniques, the creative possibilities are endless. You can incorporate beads, shells, or wooden rings into your designs to add interest and variety. You can even experiment with dyeing your cord different colors to create unique and vibrant wall hangings. So, what are you waiting for? Grab your cord and scissors and get ready to transform your walls into works of art!

Creating macrame wall hangings is not just a fun hobby, it’s also a way to add a personal and handmade touch to your living space. Experimenting with different patterns, colors, and textures can lead to endless creative possibilities and unique designs. You can even try combining macrame with other art forms, such as weaving, to take your wall hangings to the next level.

Another great aspect of macrame is that it doesn’t have to break the bank. With just a small investment in some basic materials, you can create numerous wall hangings of different sizes and styles. Get creative with your cord sources – try using leftover yarn from knitting projects or upcycle old sheets or clothing into unique macrame cords.

Once you’ve mastered the beginner projects, challenge yourself to create more complex and large-scale wall hangings that will truly make a statement in your home. Remember to share your creations with the online community using hashtags and social media platforms – you’ll be inspired by the worldwide community of macrame enthusiasts and the beautiful art they create.

So, not only will you be able to proudly display your own handmade macrame wall hangings, but you’ll also be part of a supportive and creative community that celebrates this ancient craft. Don’t be surprised if your new hobby soon turns into a passion that you can’t wait to share with others. Before you know it, you’ll be the go-to macrame expert for all your friends and family!

Finally, one of the most rewarding aspects of learning macrame is that it can become a form of meditation and self-care. The repetitive motion of tying knots can be soothing and calming, allowing you to relax and unwind after a long day. It’s a chance to unplug from the digital world and reconnect with your creativity and your surroundings. So take your time, enjoy the process, and embrace the therapeutic benefits of this ancient craft.

I hope this article has inspired you to give macrame wall hangings a try! Remember to start simple and have patience with yourself as you learn this new skill. With practice, you’ll be creating beautiful and impressive macrame wall art in no time. Happy crafting!

How to Craft a DIY Dreamcatcher

Dreamcatchers have long been a symbol of protection and positivity in many Indigenous cultures. With their intricate web-like designs and decorative feathers, they are believed to catch bad dreams and allow only good thoughts and energies to enter our minds while sleeping.

Creating your own DIY dreamcatcher can be a fun and rewarding project that allows you to tap into your creativity and learn about the cultural significance of this symbolic craft. In this step-by-step guide, we’ll take you through the process of crafting your very own dreamcatcher that you can display in your home or gift to a loved one.

The first step is to gather your supplies. You will need a hoop, which can be made from a flexible wooden vine or covered in fabric, leather, or ribbon. You will also need sinew, yarn, or string for the web, and feathers, beads, and other decorations of your choice. Take some time to source these materials, being mindful of the environmental and cultural impact of your choices. Respectfully source materials that are natural and sustainably harvested whenever possible.

Once you have your supplies, it’s important to set an intention for your dreamcatcher. Traditionally, dreamcatchers are created with positive intentions, such as protection, peace, or blessings for loved ones. Take a moment to center yourself and think about the purpose of your dreamcatcher, infusing your creation with meaning and good energy.

Now, you can begin crafting. Start by wrapping your hoop with yarn, fabric, or leather, creating a comfortable base for your web. Then, it’s time to weave the web. This can be a little tricky, so take your time and follow a tutorial if needed. The web should be carefully crafted, symbolizing the intricate nature of dreams and thoughts.

With the web in place, it’s time to add the finishing touches. Carefully attach feathers to the bottom of the dreamcatcher, allowing them to hang freely. You can also add beads, shells, or other decorative items to the web or hoop. Get creative and make your dreamcatcher unique to your style and intentions.

When your dreamcatcher is complete, take a moment to reflect on the process and the significance of your creation. Hang your dreamcatcher above your bed or in a place where it can catch the morning light, symbolizing the start of a new day filled with positive thoughts and energies.

Crafting a DIY dreamcatcher is a wonderful way to connect with your creative side and learn about the cultural importance of this symbolic craft. By following these steps and infusing your own style and intentions, you can create a dreamcatcher that not only looks beautiful but also carries a meaningful purpose.

Remember to share your creation with others and pass on the knowledge of dreamcatcher traditions, respecting and honoring the cultural heritage of Indigenous communities. Enjoy the process of crafting and may your dreamcatcher bring you peaceful nights and positive dreams.

Crafting a dreamcatcher is not just a fun DIY project, but it also carries a deeper meaning rooted in Indigenous traditions. By making your own dreamcatcher, you are participating in a cultural practice that has been passed down through generations, carrying with it a wealth of history and symbolism.

The dreamcatcher’s hoop represents the circle of life, a constant reminder of the interconnectedness of all things. As you wrap the hoop with soft materials, you are creating a gentle embrace, symbolizing unity and the warmth of community. The web, carefully woven within the hoop, serves as a metaphor for the complex nature of our dreams and thoughts. It is through this intricate web that negative energies and thoughts are trapped, allowing only positive dreams and intentions to pass through.

Feathers, an integral part of the dreamcatcher, represent not only the free-flowing nature of our aspirations but also the strength to pursue them. When we attach feathers to our dreamcatchers, we are reminded of the importance of courage and the power of our own resilience. Adorning the dreamcatcher with beads and other decorations further enhances its beauty and symbolic value, as each bead can represent a prayer, a wish, or a loved one held dear.

As you embark on the journey of crafting your DIY dreamcatcher, remember the rich history and cultural significance that it holds. Take the time to honor and respect the traditions of Indigenous communities, passing on their knowledge with gratitude and awareness. May your dreamcatcher bring you peaceful dreams and serve as a reminder of the beauty and strength within us all.

DIY Painted Rocks for Garden Decor

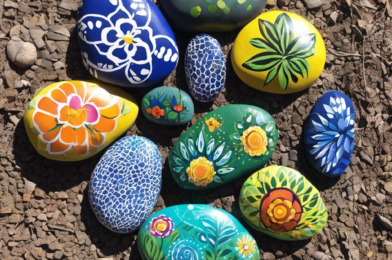
Painted rocks have become a popular trend, not just as a fun and therapeutic craft, but also as a unique way to add color and personality to your garden. This simple and affordable DIY project is a great way to get creative and add a personal touch to your outdoor space.

The beauty of painting rocks is that it is accessible to all skill levels. Whether you are an experienced artist or a beginner, rock painting offers a blank canvas for you to express your creativity. You can find smooth rocks at your local craft store or even hunt for your own in nature, making this a budget-friendly option, too. The transformation of a plain rock into a colorful work of art is not only satisfying but also a great way to add a pop of color to your garden.

When it comes to designing your rocks, the possibilities are endless. You can go for a more natural look by painting rocks to resemble ladybugs, bees, or colorful pebbles. Or, you can get creative with abstract designs, mandalas, inspirational quotes, or even paint your favorite characters or pets. The key to achieving a long-lasting design is to use the right paint and sealant. Acrylic paints are a popular choice for rock painting as they offer a wide range of colors and a durable finish. Once your design is complete, seal it with a waterproof sealant to protect it from the elements.

Display your painted rocks in a variety of ways to add interest and color to your garden. You can create a rock pathway, place them amongst your flowers and shrubs, or even use them to border plant beds and walkways. They can also be used to decorate potted plants, both indoors and out. For an added touch, you can illuminate your rocks at night with solar garden lights or fairy lights, creating a magical effect.

Involving the whole family can make rock painting even more enjoyable. It’s a wonderful activity to keep kids entertained and engaged in a screen-free way. You can also use rock painting as a teaching moment, incorporating educational elements such as color mixing, nature identification, or even spelling and language for older children. Once your rocks are painted and sealed, hide them in local parks or on hiking trails for others to find, spreading joy and positivity in your community.

Painted rocks can also be used as a meaningful way to pay tribute to a loved one who has passed away. Painting their favorite flowers, quotes, or symbols that represent their personality or interests can create a heartfelt memorial. Placing these rocks in a special spot in your garden can serve as a reminder of the person’s impact on your life and provide comfort.

If you’re looking for a fun and unique way to decorate your garden, DIY painted rocks are definitely worth considering. They add a touch of whimsy and individuality to your outdoor space and can be a wonderful conversation starter when hosting guests. So, gather your supplies, let your creativity flow, and get ready to transform your garden into a vibrant and captivating retreat.

To enhance the appearance of your garden, consider incorporating DIY painted rocks, a versatile and creative decorating option. With endless design possibilities, you can easily customize and personalize your outdoor space to reflect your unique style. Whether you’re an artist looking for a new medium or a beginner wanting to try something crafty, rock painting is a fun and rewarding hobby that anyone can enjoy. Get inspired, grab some brushes, and let your imagination run wild! The results will be a beautiful and unique addition to your garden that will impress and delight your family and friends.

For those seeking an eco-friendly and sustainable way to decorate their garden, painted rocks offer an excellent solution. Unlike other decorative options that may involve plastic or non-biodegradable materials, painted rocks are a natural and environmentally friendly choice. By decorating rocks found in nature with non-toxic paints and sealants, you can create beautiful and biodegradable art that won’t harm the environment. So, not only will your garden look stunning, but you can also feel good knowing that your decorations are earth-friendly, too!

The versatility of painted rocks as garden decor knows no bounds, offering endless possibilities for customization and creative expression. Whether you’re an artist at heart or simply seeking a fun hobby, rock painting allows you to explore a range of artistic styles and techniques. From realistic depictions of wildlife and flora to abstract expressions and whimsical designs, the only limit is your imagination. So, embrace the freedom of this unique art form, grab your paintbrush, and let your creativity transform your garden into a vibrant reflection of your personality and style.

How to Make DIY Chalkboards for Any Room

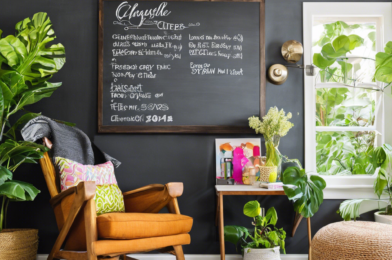
Crafting your own DIY chalkboards is a fun and creative way to add a unique touch to your space, whether it’s for functional or decorative purposes. With a few simple steps and some readily available materials, you can make customized chalkboards that suit your style and needs.

Chalkboards are a versatile addition to any room, offering an endless canvas for creativity and expression. They can be used to jot down grocery lists or upcoming events in the kitchen, or they can serve as a fun way to display quotes, menus, or family schedules. In kids’ rooms, chalkboards encourage creativity and provide a space for them to draw and learn. They’re also perfect for home offices, providing a quick way to brainstorm and organize thoughts without the need for paper.

Making your own chalkboards is a straightforward process that starts with sourcing the right materials. You’ll need chalkboard paint, which can be found at most craft stores or online. This paint can be tinted to a variety of colors, so you’re not limited to the traditional black. Beyond paint, all you need is a wooden board cut to your desired size, some sandpaper, a paint roller, and a creative vision. If you’re feeling extra adventurous, you can explore adding a frame to your chalkboard for a more polished look.

Begin by lightly sanding the wooden board to create a smooth surface for the paint to adhere to. Then, using your paint roller, carefully apply the chalkboard paint in thin, even coats, allowing sufficient drying time between coats. Typically, two or three coats are needed for a smooth and consistent finish. Once complete, condition the surface by rubbing chalk over the entire board and then wiping it clean with a soft cloth. This essential step ensures that your future writings or designs can be easily erased.

For a personalized touch, consider adding decorative elements to the borders of your chalkboard. This could be a simple pattern, a fun quote, or even a monogram. Unleash your creativity by using different colored chalk or finding unique ways to frame your board. Whether you lean towards a rustic, modern, or whimsical aesthetic, there are endless ways to customize your DIY chalkboard.

To take your chalkboard to the next level, explore the wide range of chalk art tools available. From colorful liquid chalk markers that resemble pens to soft pastel chalks in a rainbow of hues, the possibilities for artistic expression are endless. Don’t be afraid to experiment and discover the full potential of your new chalkboard. With a bit of creativity and a few simple steps, you can truly make these chalkboards your own.

For those seeking a more permanent design, there’s the option to use chalk markers or paint pens. These tools allow you to create intricate designs or write quotes that won’t easily erase, offering a long-lasting impression. Whether you choose to showcase a family motto or a intricate floral design, your chalkboard will undoubtedly become a conversation piece. By spending a little extra time on the details, your DIY chalkboard will become a beloved feature in your home.

DIY chalkboards offer a unique and customizable way to add functionality and charm to any room. Whether you’re a parent wanting to foster creativity, a busy bee seeking better organization, or simply a lover of all things crafty, this project is sure to bring enjoyment and a sense of accomplishment. So, gather your materials, roll up your sleeves, and embrace your inner artist as you create one-of-a-kind chalkboards tailored to your style and needs. Happy crafting!

DIY Wind Chimes from Recycled Items

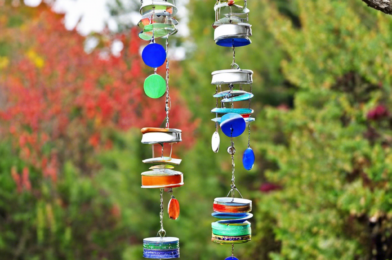
Creating wind chimes from recycled items is an innovative way to add a personal and eco-friendly touch to your home or garden. Not only do they produce a soothing melody, but they also serve as unique conversation pieces. With a bit of creativity and some basic crafting skills, you can fashion these musical ornaments from everyday objects, infusing your space with charm and individuality.

Wind chimes have a long history in various cultures, often believed to ward off evil spirits and invite good fortune. Their gentle melodies have been revered for their calming effects, creating a harmonious connection with nature. In this modern age, wind chimes continue to captivate us, whether through their enchanting tones or as decorative accents that reflect our personal styles.

To craft your own wind chimes using recycled materials, begin by gathering items such as old silverware, driftwood or tree branches, and discarded keys. With a bit of ingenuity, these commonplace objects can be transformed into enchanting wind chimes. For a more traditional approach, consider using recycled metal tubes or pipes, tuning them to create a harmonious scale that resonates with the wind.

The process of creating DIY wind chimes offers a satisfying outlet for creativity. It allows you to design a one-of-a-kind piece that reflects your individual taste and style. Experiment with different materials, sizes, and shapes to craft a wind chime that is truly yours. Whether you prefer a rustic aesthetic or a more contemporary design, the possibilities are endless when you embrace the art of upcycling.

In addition to their aesthetic appeal, recycled wind chimes carry a deeper significance. They represent a conscious effort to reduce waste and promote sustainability. By repurposing discarded items, you are giving new life to something that might otherwise end up in a landfill. This eco-friendly approach to crafting not only contributes to a greener planet but also inspires others to follow suit, fostering a more environmentally conscious community.

When it comes to constructing your wind chimes, the options are limited only by your imagination. Explore different hanging techniques, such as using twine or metal chains, to achieve varying sounds and visual effects. Experiment with the spacing and arrangement of the hanging objects to create unique melodies and harmonious movements. The journey of crafting your own wind chimes is as rewarding as the final product itself.

As you embark on crafting these musical masterpieces, take pride in the fact that your wind chimes are not only beautiful but also environmentally conscious. They serve as a testament to your creativity, resourcefulness, and commitment to sustainability. So, whether you hang them on your front porch or amidst your garden blooms, let these DIY wind chimes serenade you with their gentle melodies, reminding you of the beauty and fulfillment that come from crafting with recycled treasures.

Embellish your creation further by incorporating found objects from nature, such as seashells or dried flowers, to add a whimsical touch. If you’re feeling adventurous, experiment with painting or engraving designs on the wind chimes to make them even more personalized. The possibilities are indeed limitless when it comes to customizing your own wind chimes.

For those seeking inspiration, online platforms like Pinterest and Instagram offer a treasure trove of ideas. A simple search will unveil a multitude of creative designs, from rustic farmhouse-style wind chimes to modern, minimalist creations. You can also explore different upcycling techniques, such as melting down old bottles to form unique glass pendants for your wind chime strands.

In your pursuit of crafting eco-friendly wind chimes, don’t overlook the potential of recycled glass. Wine bottles, jars, and even broken glass pieces can be transformed into stunning wind chime accents. Cut or smash the glass to create fragments, then smooth the edges for safety. Drill holes for hanging, and you’ll have shimmering, sun-catching elements that add a whole new dimension to your creation.

While crafting wind chimes from recycled items is certainly a rewarding endeavor, it’s important to prioritize safety. Always wear protective gear, including gloves and safety goggles, when working with sharp objects or power tools. If you’re working with glass, take extra care to smooth any sharp edges to prevent injuries. By taking these simple precautions, you can ensure that the crafting process is both enjoyable and safe.

When you’ve perfected your wind chime-making skills and have honed your unique style, consider sharing your creations with the world. Local craft fairs and markets provide excellent opportunities to showcase and sell your artisanal wind chimes. Not only will you be spreading the joy of eco-friendly crafting, but you’ll also be supporting small businesses and local artisans. It’s a wonderful way to connect with your community and inspire others to embrace sustainability.

In conclusion, crafting DIY wind chimes from recycled items is a fun, creative, and eco-friendly endeavor that anyone can undertake. Whether you’re a seasoned crafter or just starting out, the process of transforming discarded objects into harmonious works of art is deeply rewarding. So, embrace your inner artist, gather those recyclables, and let your imagination take flight as you create whimsical wind chimes that will enchant and inspire. Happy crafting!

How to Craft Your Own Bookmarks

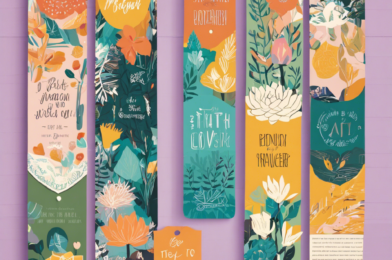
Crafting your own bookmarks is a fun and creative way to personalize your reading experience and express your unique style. It’s also a great way to reuse and recycle materials you already have at home. So, if you’re looking for a simple craft project that will add a touch of individuality to your books, here’s a step-by-step guide on how to make your own bookmarks.

First, gather your supplies. You’ll need some sturdy paper or thin cardboard for the base of your bookmark. This could be recycled from old cereal boxes, greeting cards, or scrapbooking paper. You’ll also want to gather various decorative materials such as markers, paint, stickers, ribbons, stamps, glitter, or washi tape. Get creative and use whatever craft supplies you have on hand!

Next, decide on the size and shape of your bookmark. Traditional bookmarks are rectangular, but you can experiment with different shapes such as triangles, clouds, or even a silhouette of your favorite character. Cut out your shape carefully using scissors or a craft knife. If you’re using thin cardboard, a craft knife and a self-healing mat will help you achieve a precise cut.

Now for the fun part – decorating! This is where you can let your creativity run wild. Experiment with different color combinations, patterns, and textures. Try out various techniques such as collage, stamping, or painting. If you’re feeling extra creative, you can even try your hand at calligraphy or hand-lettering a quote or your name on the bookmark. Adding a tassel or a ribbon embellishment will also give your bookmark a stylish finish.

Once you’re happy with your design, it’s a good idea to protect your artwork by applying a thin coat of Mod Podge or clear spray sealant. This will ensure that your bookmark remains durable and the colors stay vibrant even with frequent use. Leave it to dry completely before using your beautiful, handmade bookmark.

Crafting bookmarks is a wonderful way to spend an afternoon, and it can also be a fantastic group activity for book clubs, classroom settings, or a fun get-together with craft-loving friends. It’s a simple project that leaves plenty of room for creativity and personalization. So go ahead and give it a try! Personalize your reading journey and showcase your individuality with these one-of-a-kind bookmarks. Happy crafting and happy reading!

Your handmade bookmark is now ready to accompany you on countless adventures through the pages of your favorite books. It’s a wonderful feeling to not only create something with your own hands but also to have a unique and personal item that reflects your interests and artistic flair. So go ahead, curl up with a good book and your new bookmark, and enjoy the simple pleasure of a handmade treasure that enhances your reading ritual. Don’t be surprised if your beautifully crafted bookmark inspires curiosity and sparks conversations wherever your literary travels take you.

Don’t be afraid to experiment and let your creativity flow – after all, the beauty of crafting is in the unique imperfections that make your creation one-of-a-kind. Most importantly, have fun and enjoy the process of bringing your bookmark to life. Whether you’re a seasoned crafter or a beginner, taking the time to create something personalized and special is a rewarding experience that will add a touch of magic to your reading nook. Happy crafting and happy reading, makers and bookworms alike!

Now that you’ve crafted your own bookmarks, you might be interested in other simple craft projects to personalize your space and everyday items. These projects are a great way to express your creativity and add a touch of individuality to your surroundings. From customizing your phone case to designing your own stationery, there are endless possibilities for crafting functional and aesthetically pleasing items. So, keep that creative momentum going and explore the wonderful world of DIY.

There are plenty of online resources and craft communities to inspire your next project. You can explore Pinterest for endless craft ideas and step-by-step guides or join crafting groups on social media platforms to connect with like-minded individuals. These communities often share tips, tricks, and new techniques, providing endless inspiration for your future creations. So, whether you’re a beginner or an experienced crafter, there’s always something new to learn and create. Happy crafting!

DIY Jewelry Organizers for Your Collection

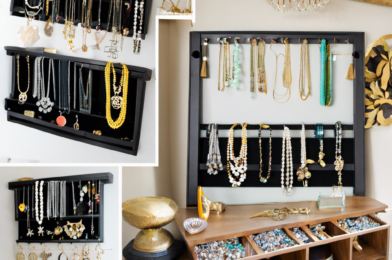
We all have our unique ways of expressing our style and personality through our choice of jewelry. For some, it may be a simple pair of stud earrings, while for others, it could be a stack of bold, colorful bangles. Whatever your taste, one thing is universal: the need for a functional and stylish way to organize your precious collection. If you’re anything like me, you probably have a beloved collection of jewelry that you’ve accumulated over the years. But, like me, you may also struggle with finding a stylish and efficient way to organize and store your treasured pieces. Well, struggle no more! I’ve gathered some fantastic DIY jewelry organizer ideas that will not only keep your collection neatly displayed but also add a touch of charm to your space.

There’s something truly special about creating your own jewelry organizer. Not only do you get a functional piece that keeps your treasures tidy, but you also inject a dose of your unique style and creativity into your space. Whether you’re a maximalist or a minimalist, there’s a DIY project here that’s perfect for your taste and skill level. So, get ready to roll up your sleeves and give your jewelry the showcase it deserves! From creative frames to rustic wood designs, the possibilities are endless.

One of my favorite ways to display my earrings and necklaces is by using a beautifully decorated picture frame. Simply take an old frame and attach a metal screen or wire mesh to the back. Not only does this create a unique 3D display for your earrings, but it also adds a decorative touch to your wall. If you’re feeling extra creative, paint the frame a bold color or add some embellishment for a truly personalized touch. For a more rustic look, why not create a jewelry organizer from a piece of reclaimed wood? Drill some holes and attach some hooks to hang your necklaces and bracelets.

Another creative idea is to repurpose a vintage garden rake. Simply give it a fresh coat of paint and attach some S-hooks to the tines for a unique way to display your necklaces and bracelets. If you’re a fan of upcycling, try transforming an old cutlery tray into a chic jewelry organizer. Line the compartments with pretty fabric or paper and use it to sort and store your earrings, rings, and bracelets. For a more modern look, create a sleek jewelry display using a simple wooden board and some brass tubing. Cut the tubing to size and attach it to the board to create a stylish holder for your necklaces and bracelets.

If you’re short on space, try making a hanging jewelry organizer. All you need is a piece of fabric and a wooden dowel. Simply attach some hooks or bars to the bottom of the fabric and use it to hang your earrings, necklaces, and bracelets. Then, hang the dowel on the wall, and you’ve got a space-saving, stylish solution. These DIY jewelry organizer ideas are not only functional but also add a unique decorative touch to your space. So, whether you’re a jewelry hoarder or simply looking for a creative way to display your favorite pieces, give these projects a try!

For all the earring lovers out there, a creative earring organizer is a must. Take an old wine cork board and attach a metal screen to it. Now you have a place to display all your beautiful earrings, and it doubles as a unique piece of wall art. If you’re feeling extra crafty, decorate the frame with washi tape or paint to give it a fun and modern look. Speaking of modern, how about a jewelry organizer that’s not only functional but also a piece of decor in itself? Take a simple wooden dowel and attach some sleek leather straps. Hang your necklaces and earrings on it for a Scandi-inspired display that will impress all your guests.

Another fun idea is to use a decorative ladder as a jewelry organizer. Lean a small ladder against your wall and hang your necklaces, bracelets, and rings from the rungs. Not only does this look super cute, but it’s also a great space-saver. If you’re a fan of boho-chic style, macrame jewelry organizers are a must. Create a beautiful wall hanging with knotted cords and use the loops to display your earrings and bracelets. This adds texture and a handmade touch to your space. Lastly, for a touch of glamour, how about a jewelry display bust? You can make your own using a mannequin bust and some foam core board. Simply cover the board with a glamorous fabric and attach it to the bust. Now you have a place to showcase your statement necklaces and earrings.

I hope these ideas inspire you to create a functional and stylish jewelry organizer that suits your unique taste. Whether you go for a rustic, modern, or upcycled look, there’s nothing more satisfying than displaying your collection with a personalized touch. Happy crafting!

How to Make Your Own Scented Candles

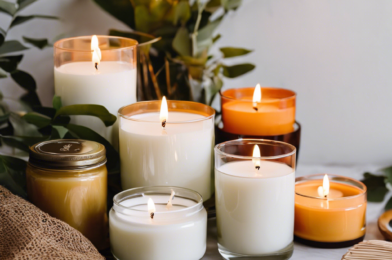
Making scented candles at home is a fun and rewarding hobby that can also save you money. Store-bought scented candles can be expensive, and sometimes the scents available may not be to your taste. By making your own, you can create unique fragrances that fill your home with delightful aromas.

The process of making scented candles is relatively simple and only requires a few basic supplies: wax, a candle wick, a heat-safe container, fragrance oil or essential oil, and a glue dot or super glue. You can find these supplies at craft stores or order them online. It is important to use candle-making wax, such as soy wax or paraffin wax, as these types of wax burn cleanly and have a good scent throw.

To get started, you’ll need to decide on the type of wax you want to use. Soy wax is a popular option as it is natural, biodegradable, and has a long burn time. However, paraffin wax is also commonly used and provides a strong scent throw. Once you’ve chosen your wax, it’s time to select a fragrance. Fragrance oils come in a wide variety of scents, from floral and fruity to musky and woody. You can also use essential oils for a more natural option.

Preparing the wax is the next step. This involves melting the wax flakes or pellets in a double boiler or a heat-safe container in the microwave. Once the wax is melted, it’s important to stir it regularly to prevent overheating and to ensure a smooth, even consistency. Before adding your fragrance oil, let the wax cool down slightly. The amount of fragrance oil you’ll need will depend on the type of wax and the strength of the fragrance oil, so it’s important to follow the manufacturer’s instructions. Generally, a ratio of 1 ounce of fragrance oil to 1 pound of wax is a good starting point.

After adding the fragrance oil, it’s time to prepare your container and wick. Adhere the wick to the bottom of your container using a glue dot or super glue, then prime the wick by dipping it in melted wax and allowing it to cool. Center the wick in the container, making sure it remains straight and secure. Now, carefully pour the scented wax into the container, leaving a small amount of space at the top. Allow the candle to cool and set, which can take several hours.

Once your candle has set, trim the wick to about ¼ inch and enjoy your creation! Making scented candles is a delightful way to bring your favorite fragrances into your home while also creating a cozy and inviting atmosphere. Whether you’re crafting them for yourself or as gifts for loved ones, the process is an enjoyable and satisfying hobby.

DIY Fabric Baskets for Storage

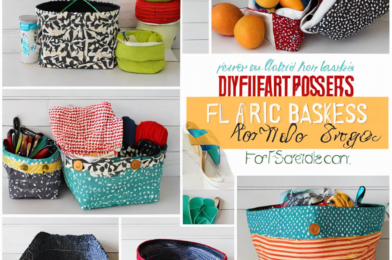
The humble storage basket is having a moment. Once a mere functional item, it has now become a must-have accessory for the aesthetically minded, with homeowners and renters alike seeking stylish ways to stay organized. Enter the DIY fabric basket – an easy, affordable, and, most importantly, cute solution to your storage needs.

With just a few simple supplies and a bit of creativity, you can craft your own fabric baskets tailored to your unique style and space constraints. Whether you’re aiming for a rustic, farmhouse vibe or a more modern, minimalist look, the beauty of the DIY fabric basket is that it can be customized to fit any décor scheme.

So, what do you need to get started? The primary materials required are fabric of your choice, some stiff interfacing or stabilizer, and basic sewing essentials like thread, scissors, and a sewing machine. You can opt for cotton fabric for a soft, pliable basket or go for a sturdier option like canvas or decor weight fabric. The interfacing or stabilizer is key to giving your basket structure and ensuring it holds its shape.

To begin the crafting process, you’ll first need to cut out your fabric pieces according to your chosen basket pattern. There are myriad free patterns available online catering to various shapes, sizes, and skill levels. Once your pieces are cut, you’ll sew them together, taking care to follow the pattern instructions for any specific assembly steps.

One of the most enjoyable parts of this DIY project is the opportunity to personalize your baskets. Embrace your creativity and experiment with different fabric combinations, adding cute accents like pom-pom trim or colorful ribbon. You can also try your hand at embroidery to adorn your baskets with whimsical designs or meaningful phrases.

In addition to their aesthetic appeal, DIY fabric baskets offer a range of practical benefits. They are lightweight, making them easy to move around your home as needed, and their soft sides allow them to fit snugly into various spaces, from bookshelves to linen closets.

Fabric baskets also provide a safer alternative to glass or ceramic containers, especially in homes with young children or curious pets. And, should they get dirty, most fabric baskets are machine washable, ensuring they stay looking fresh and new.

Whether you’re aiming to organize your pantry, tidy up your linen closet, or simply add a stylish accent to your living space, DIY fabric baskets offer a charming and functional solution. So, gather your supplies, get crafting, and embrace the joy of creative organization!

How to Create DIY Picture Collages

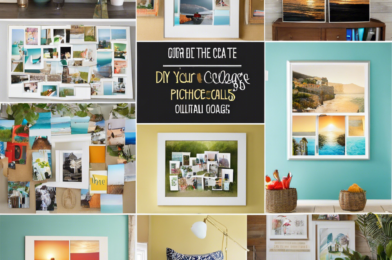
Creating a DIY picture collage is a fun and creative way to display your cherished memories and personalize your space. It’s an easy and affordable project that anyone can do, and the results can be truly stunning. So, if you’re looking for a unique way to showcase your favorite photos, here’s a step-by-step guide to help you create a beautiful DIY picture collage.

First, select a theme or color scheme for your collage. This could be based on the type of photos you want to use, a specific color palette you love, or even a particular event or trip you want to commemorate. Having a theme will help bring cohesion to your collage and make it look more polished. Once you’ve selected your theme, gather your photos and sort them accordingly. You may want to edit your photos first, such as by applying filters or cropping them to focus on the key subjects, to ensure they look their best.

Next, decide on the layout of your collage. Play around with different arrangements and sizes of photos to create a visually appealing composition. You can go for a symmetrical grid layout or a more organic, free-form style, depending on your preference. Consider using varying sizes and shapes of photos to add interest and depth to your collage. Once you’ve decided on the layout, it’s time to gather your materials.

Besides your selected photos, you’ll need a few basic supplies such as a pair of scissors, glue or double-sided tape, and a background for your collage. The background could be a piece of cardboard, foam core, or even a wooden board, depending on the desired finish and how long you want it to last. If you’re planning to hang your collage, don’t forget to grab some string or twine as well.

Now, it’s time to start assembling your collage. Start by laying out your photos on the background according to your chosen layout. Once you’re happy with the arrangement, carefully glue or tape each photo in place. Take your time with this step to ensure that your photos are securely attached and that your collage looks neat and precise.

To add extra flair to your collage, consider embellishing it with decorative elements such as washi tape, stickers, or even small mementos related to your theme. You can also try experimenting with different backgrounds, such as patterned paper or fabric, to add a unique twist to your design. Framing your collage can give it a more finished and elegant look, and it’s a great way to protect your creation too.

Once your collage is complete, step back and admire your handiwork. You’ve successfully created a personalized and meaningful piece of art that’s sure to brighten up any space. Whether you hang it on your wall, lean it on a shelf, or gift it to a loved one, your DIY picture collage is a unique and special creation that celebrates your cherished memories in style. So, go ahead and start snapping photos and crafting collages to your heart’s content!