Updated September 8, 2026 · By Ryan Bold
To create a second data volume on an SSD in Windows 11, use unallocated space or shrink an existing volume in Disk Management. The key precaution is identifying the correct disk and preserving its existing data—not choosing a particular partitioning app.
A second partition can help organize files, but it is not a backup. If the SSD fails, both partitions can be lost. Keep an independent backup before resizing anything.
Prepare a disk map
Open diskmgmt.msc from the Run dialog. Record the physical disk number, capacity, existing drive letters and partition labels. Check these against File Explorer and, if necessary, the drive’s model. Do not identify a drive by “Disk 1” alone; numbering can change.
Save your device-encryption or BitLocker recovery information somewhere you can reach without this computer. Keep the machine on reliable power. Do not modify EFI, recovery, OEM or unfamiliar partitions to make room for a data volume.
Choose the correct operation
| What you see | Next step |
|---|---|
| Unallocated space on the intended disk | Create a new simple volume there |
| An existing volume occupies the space | Back up, then assess whether it can be shrunk |
| A disk unexpectedly appears uninitialized or RAW | Stop; initialization or formatting may destroy recovery options |
Shrink and create the volume
- Right-click the existing data volume and choose Shrink Volume. Review the available shrink space.
- Enter the amount to release in the units shown. Leave enough free space for the original volume’s applications, updates and files.
- After shrinking completes, right-click the resulting Unallocated area and choose New Simple Volume.
- Choose the size, an unused drive letter and a descriptive label. NTFS is a usual choice for a Windows-only data volume.
- Review the disk and size again before finishing.
Microsoft’s Disk Management guide describes volume creation and warns that formatting destroys data. Its shrink-volume documentation explains constraints such as unmovable files.
Worked planning example
Suppose your C: volume has 180 GiB free and you want a separate project workspace. That does not mean you should allocate all 180 GiB to the new volume. Write down expected project growth, the applications remaining on C:, and a reserve for updates. If those needs cannot fit comfortably, using a folder on C: or another drive may be the better choice.
Keep the units consistent when converting a planned size into the wizard’s input. In binary units, 100 GiB = 102,400 MiB; MiB and decimal MB are not interchangeable. Windows storage tools can label binary quantities as MB or GB. Check the unit and previewed size in your own dialog instead of treating the manufacturer’s decimal capacity as the same measurement.
If shrinking offers less space than expected
Free space in File Explorer and shrinkable space are different. Files near the end of a volume can limit shrinking. Do not respond by deleting recovery partitions or disabling protection at random. Check Microsoft’s explanation, reduce the requested size, or obtain qualified help if the disk contains important data.
Read the layout before deciding what to shrink
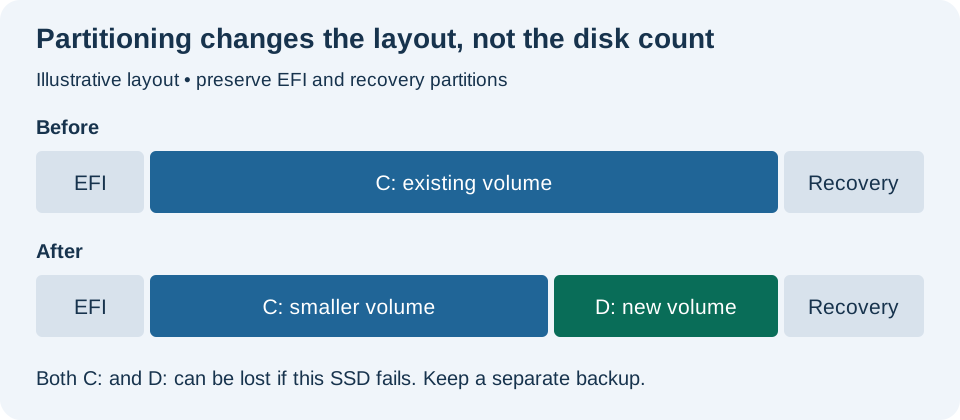
The diagram keeps EFI and recovery partitions in place. Space becomes available by shrinking the chosen ordinary volume. Creating D: in that space reorganizes the same physical SSD; it does not provide a second copy on a separate device.
For the earlier 180 GiB-free example, suppose your own plan reserves 80 GiB for existing applications and future updates. That leaves a planning ceiling of 100 GiB for the new workspace, before considering the wizard’s smaller shrinkable-space limit. These are hypothetical budget choices, not a Windows minimum. If Disk Management offers only 60 GiB, that lower figure controls what it can currently release.
Before pressing Finish, compare three items with your note: physical disk, amount of space, and the volume receiving the new letter.
Verify before relying on it
Open the new drive in File Explorer, create a small test file and reopen it. Check that the original files and applications remain accessible. Add the new drive to your backup configuration; a backup job that previously covered only C: may omit it.
Correction, September 8, 2026: clarified MB versus MiB and made the hypothetical capacity example consistent in GiB. The binary conversion is 102,400 MiB for 100 GiB.